Add Reources
The Plan is the container for resources (the elements of the Plan). You can add resources to a plan and the same resource can be present in more then one plan at the same time.
More than one plan can have the same resources with different schedules
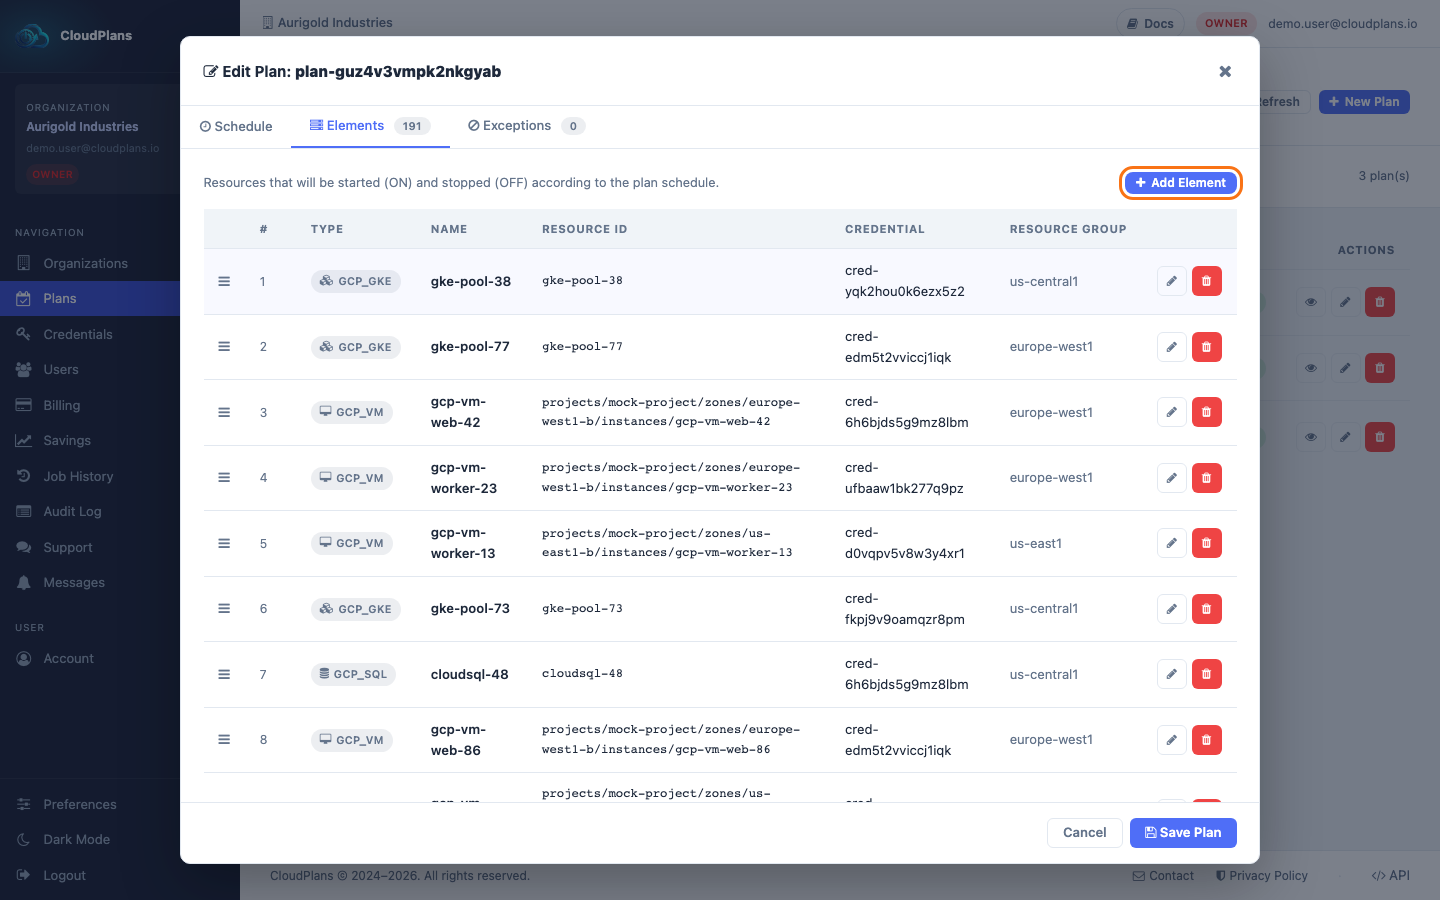
- Open the plan edition from the Menu (steps are here) and go to the Elements tab
- Click the Add Element button
- In the form, choose first the Operation and then the Service Type (the services are grouped by cloud: AWS, Azure and GCP)
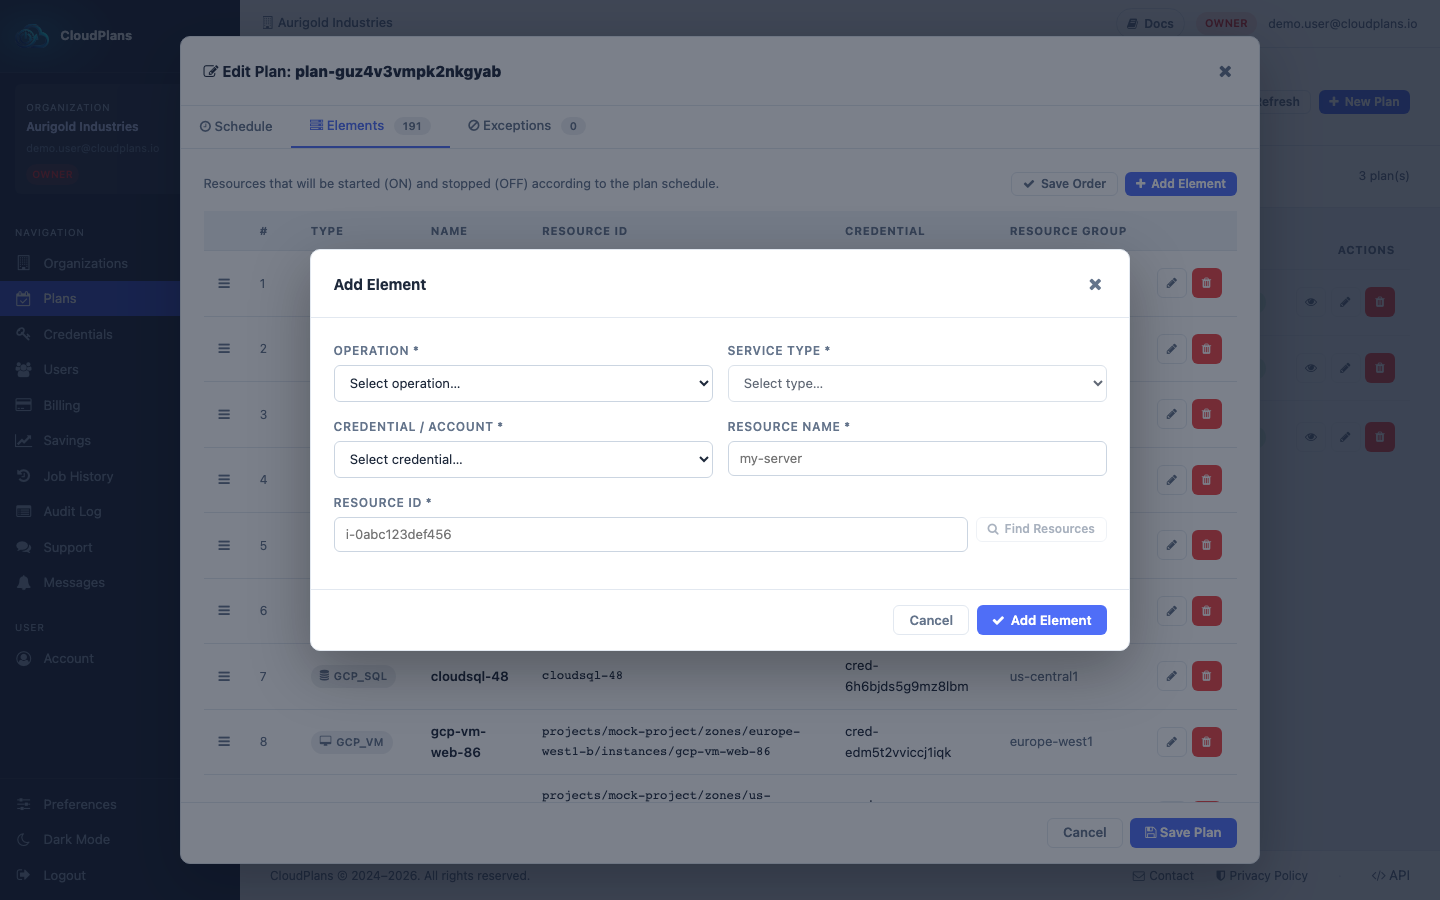
- The operation can be Power On/Off (start/stop), Horizontal Scaling (capacity) or Vertical Resize (instance type/class). The last two are explained in Horizontal and vertical scaling.
- Fill in the data (required fields are marked with *):
- Credential / Account: the credential of the cloud account where the resource lives
- Resource Name
- Resource ID: the instance ID, VM ID, self link... depending on the service. Find Resources lists the resources of the selected credential so you can pick one
- Region (AWS) or Resource Group (Azure)
- Only for scaling operations: the ON/OFF capacity or the ON/OFF size
- Click Add Element at the bottom of the form and then Save Plan
Once the element is added, you can change the order of the elements: drag them by the handle, see Reorder Resources.